
HERE SDKをSwiftUIで使用してみる - 環境構築・マップ表示


アカウント作成
まずはhttps://www.here.com/でアカウントを作成します。
途中で支払い方法を入力する欄があります。
これを入力しないとHERE SDKが使用できないため、入力しておきましょう。
HERE SDKダウンロード
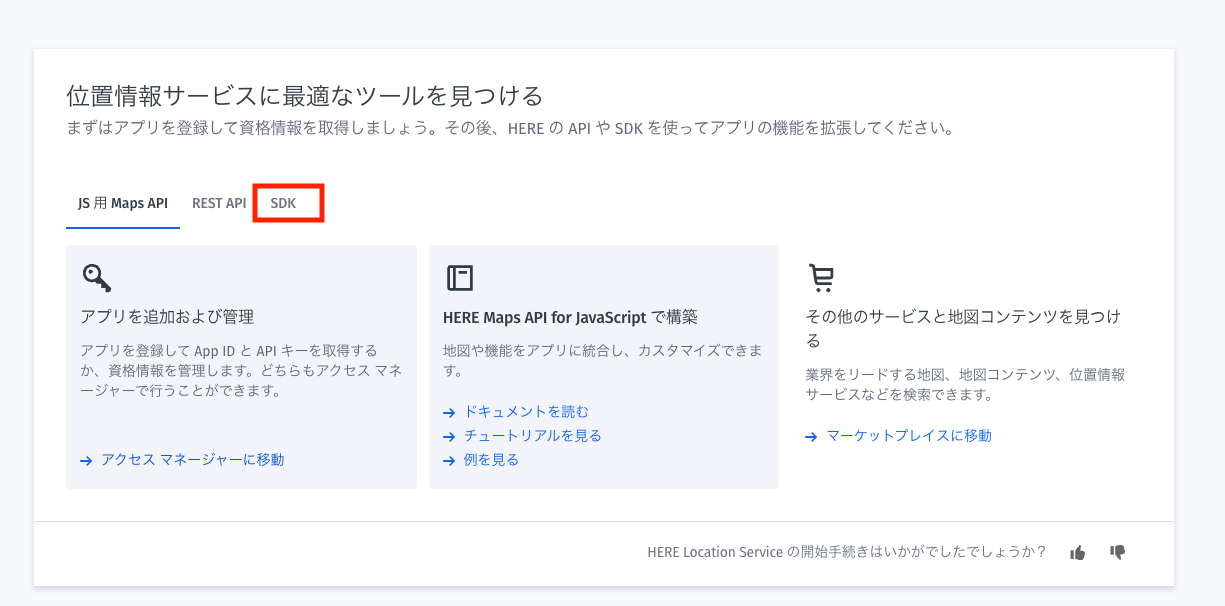
SDKのダウンロードページには、プラットフォームから移動できます。
https://platform.here.com/portal/
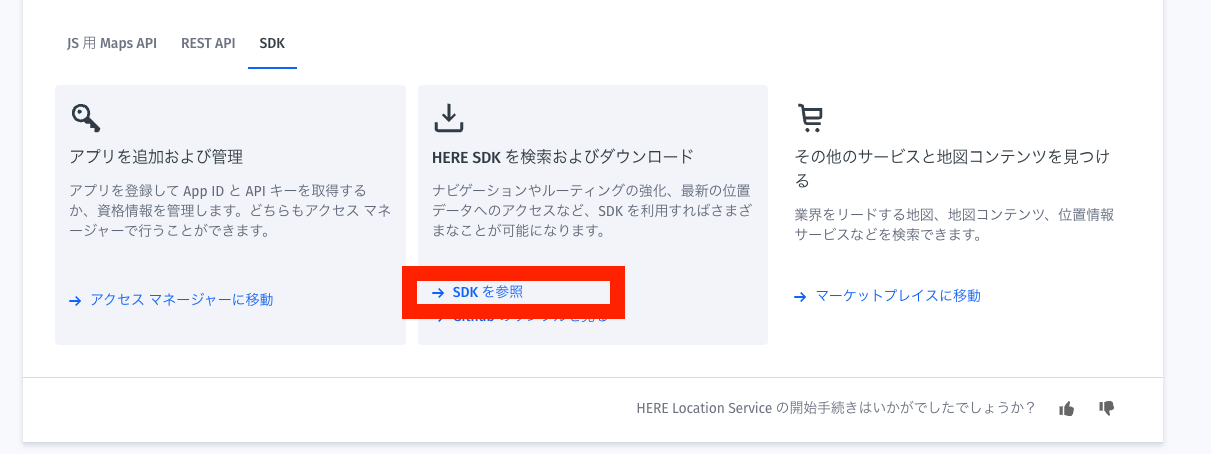
HERE SDKには大きく分けて3つ種類があります。
- Lite Edition
- Explore Edition
- Navigate Edition(法人用?)
参照: What's the difference between the Lite, Explore and Navigate Editions of the HERE SDK?
今回は「Explore Edition」を使用します。
ダウンロードしたzipファイルを解凍し、中をみると、複数のzipファイルが入っています。
「.tar.gz」ファイルの中にSDKが入っています。
アプリ登録(アクセスキー取得)
HERE SDKを使用するには、アクセスキーが必要です。
アクセスキーを取得するには、https://platform.here.com/portal/から、「アクセスマネージャ」に移動します。
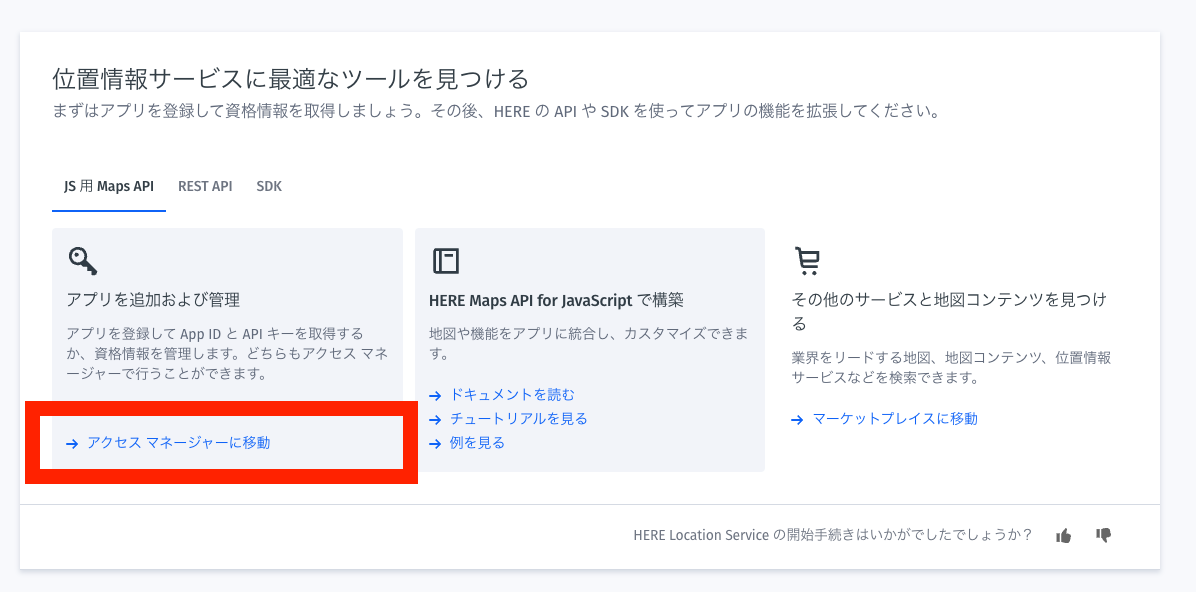
「新しいアプリを登録」ボタンを押し、アプリを作成します。
私は「heresdk playground」と名付けました。
アプリを作成したら、「資格情報」タブにある「OAuth」の中の「資格情報を作成」ボタンを押します。
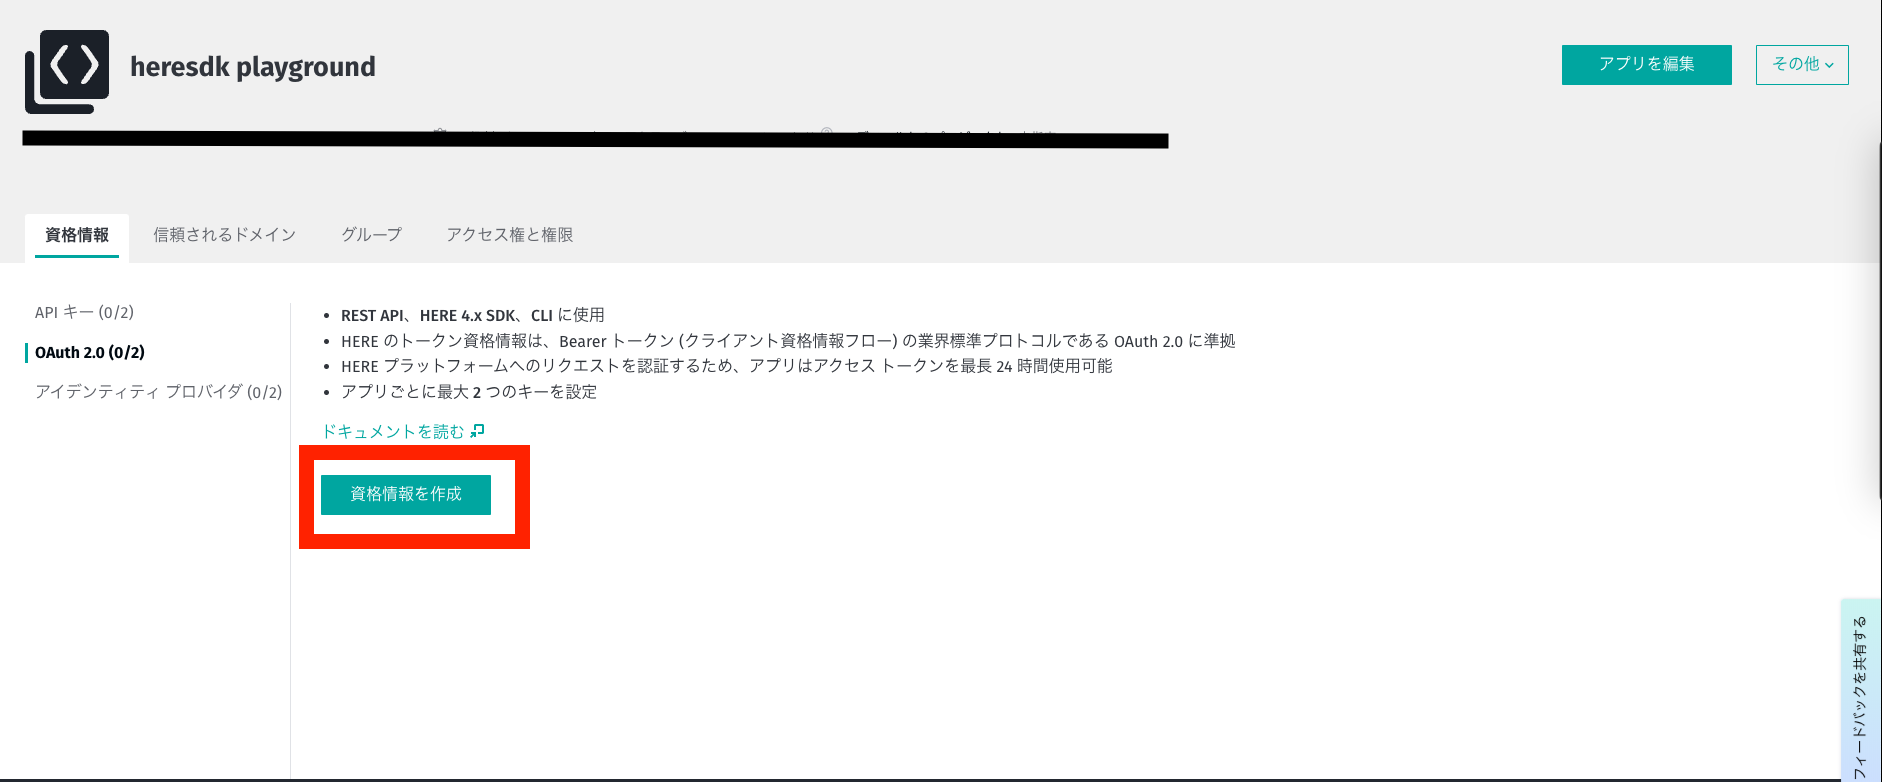
表示されたアクセスキーをダウンロードするか、メモしておきましょう。
プロジェクトのセットアップ
Xcodeでプロジェクトを立ち上げます。
私は「HerePlayground」と名付けました。
プロジェクトファイルを開き、フレームワークを追加します。
Add Files...から、先ほどダウンロードした、HERE SDKのフォルダ内にある、「heresdk.xcframework」を選択します。
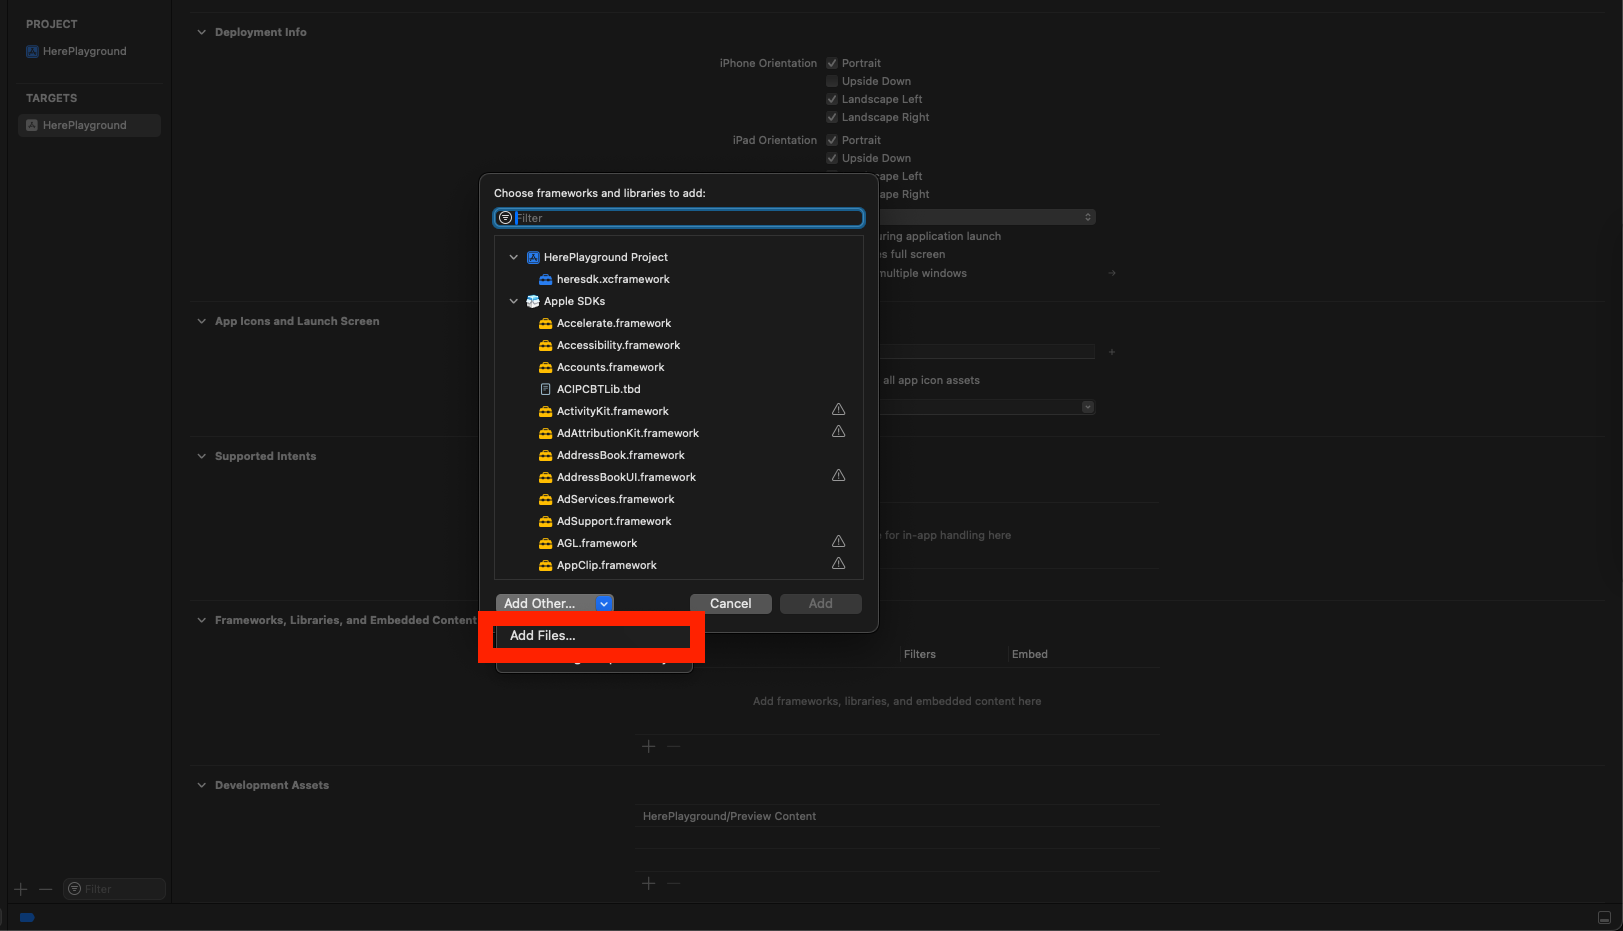
ファイル一覧タブに「Frameworks」が追加されていれば成功です。
次にAppDelegateファイルを作成します。
以下のコードのアクセスキー・アクセスシークレットキーの部分に、先ほど「アプリ登録」で取得したコードを入れます。
AppDelegate.swiftimport SwiftUI
import heresdk

class AppDelegate: UIResponder, UIApplicationDelegate {
    // アプリ起動
    func application(_ application: UIApplication, didFinishLaunchingWithOptions launchOptions: [UIApplication.LaunchOptionsKey : Any]? = nil) -> Bool {
        // HERE SDKを初期化する
        initializeHERESDK()
        return true
    }

    // アプリ終了
    func applicationWillTerminate(_ application: UIApplication) {
        // HERE SDKのリソースを解放する
        disposeHERESDK()
    }

    private func initializeHERESDK() {
        let accessKeyID = "アクセスキー"
        let accessKeySecret = "シークレットアクセスキー"
        let options = SDKOptions(accessKeyId: accessKeyID, accessKeySecret: accessKeySecret)
        do {
            try SDKNativeEngine.makeSharedInstance(options: options)
        } catch let engineInstantiationError {
            fatalError("Failed to initialize the HERE SDK. Cause: \(engineInstantiationError)")
        }
    }

    private func disposeHERESDK() {
        SDKNativeEngine.sharedInstance = nil
    }
}
ルート(私の場合HerePlaygroundApp.swift)にAppDelegateを紐づけておきましょう。
HerePlaygroundApp.swiftimport SwiftUI
import heresdk

@main
struct HerePlaygroundApp: App {
    // 追加
    @UIApplicationDelegateAdaptor(AppDelegate.self) var appDelegate

    var body: some Scene {
        WindowGroup {
            ContentView()
        }
    }
}
これでHERE SDKを利用する準備が整いました。
マップ表示
まずはマップ表示のためのViewを作成します。
完全にSwiftUIで構築したいので、UIViewRepresentableを使って実装します。
HereMapView.swiftimport SwiftUI
import heresdk

struct HereMapView: UIViewRepresentable {
    @Binding var mapView: MapView
    func makeUIView(context: Context) -> MapView { return mapView }
    func updateUIView(_ mapView: MapView, context: Context) {}
}
次に、マップをいじるためのMapHandlerクラスを作成します。
camera(マップに表示する領域)は、試しに東京駅に設定しておきました。
参考:GoogleMap - 緯度と経度の座標で位置を確認または検索する
MapHandler.swiftimport SwiftUI
import heresdk

class MapHandler {
    private var mapView: MapView

    init(_ mapView: MapView) {
        self.mapView = mapView

        // カメラ設定(マップに表示する領域)
        let camera = mapView.camera
        // 初期ズーム値
        let distanceInMeters = MapMeasure(kind: .distance, value: 1000 * 10)
        camera.lookAt(
            point: GeoCoordinates(latitude: 35.68134074423331, longitude: 139.76738227791748),
            zoom: distanceInMeters
        )
        // マップをロード
        mapView.mapScene.loadScene(mapScheme: MapScheme.normalDay, completion: onLoadScene)
    }

    // マップのロード後処理
    private func onLoadScene(mapError: MapError?) {
        if let mapError = mapError {
            print("Error: Map scene not loaded, \(String(describing: mapError))")
        }
    }
}
↑で作ったView, ClassをContentViewに紐づけます。
ContentView.swiftimport SwiftUI
import heresdk

struct ContentView: View {
    @State private var mapView = MapView()
    @State private var mapHandler: MapHandler?

    var body: some View {
        HereMapView(mapView: $mapView)
            .ignoresSafeArea()
            // 画面表示時にインスタンス化
            .onAppear {
                mapHandler = MapHandler(mapView)
            }
    }
}

#Preview {
    ContentView()
}
ここまでできたらビルドしてみます。
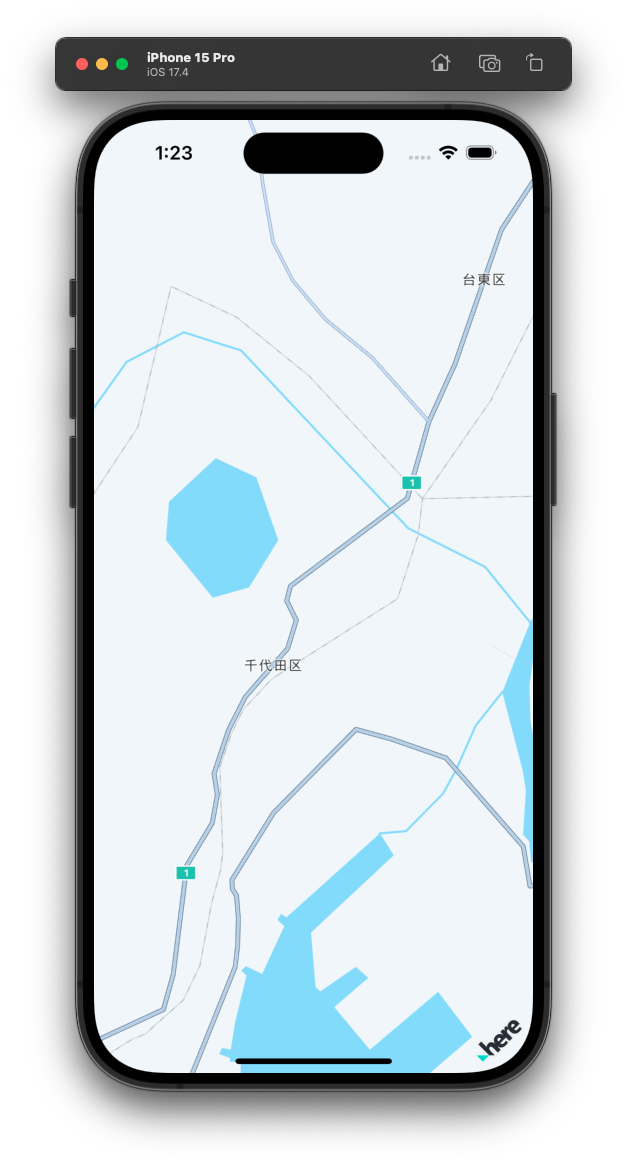
あれ...?
なんかGoogle Map的な感じのイケてるマップを期待していたのですが、何も表示されません。
調べてみると、日本やその他数国のマップデータは、Exploreでは利用できないらしく、Navigateプランでかつ申請を出さないと使えないようです...
参考:HERE SDK for iOS Navigate - 地図とサービス
日本マップはダメということなので、試しにアメリカを表示してみると...
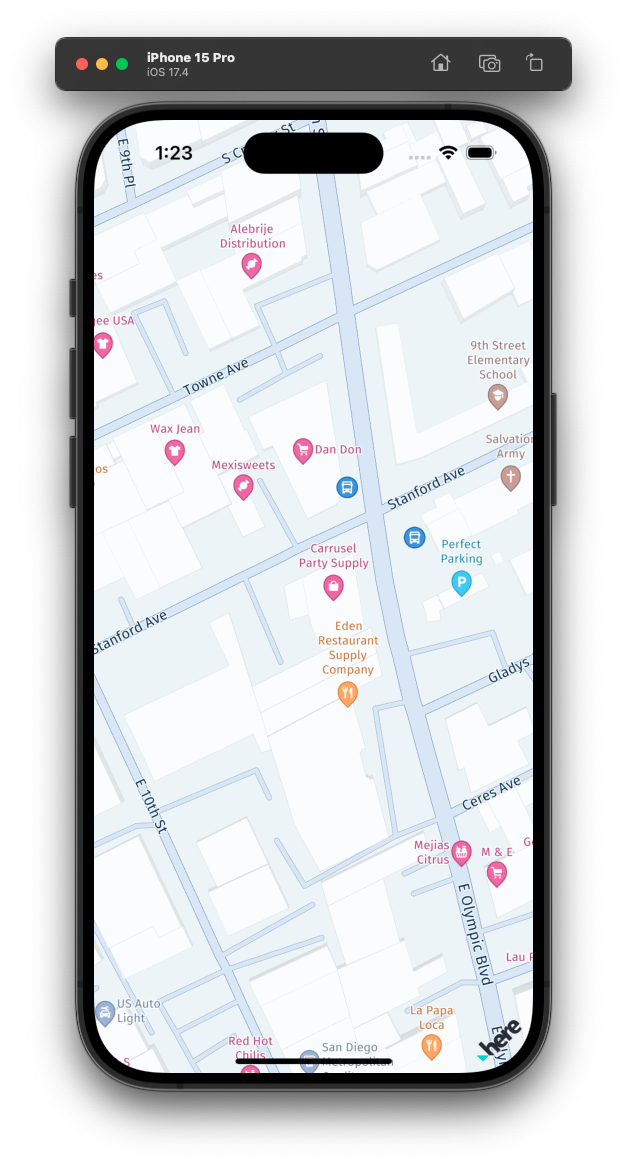
イケてるマップが表示されました👏
🙂↕️最後まで読んでいただきありがとうございます🙂↕️


